''/> Idly/Dosa Batter Measurements Skip to main content

Latest on the Blog

Brinjal Gothsu (Curry with Brinjal)

Idly/Dosa Batter Measurements

So this is something I knew since many years but I never implemented it. Well because I was lazy and used to think its a long process and its easier to get readymade from outside. But necessity is what makes people work and I finally started making it. And when I did, I am now thinking why didn't I ever make this before or put this in practice. I guess its just for the convenience. All these years I have bought readymade packed batter. Finally I have mastered it by using my mom's recipe and hoping that these measurements would help someone like me. Lets see how its done. Step by step Pics and video uploaded for reference. 

Do check out other Protein Dosa recipe along with Instant Leftover rice Dosa recipe on the blog. 
If you looking for other breakfast options, don't forget to check this List

Recipe updated in September 2020 
Dosa/Idly Batter : See notes and tips below
Ingredients : 
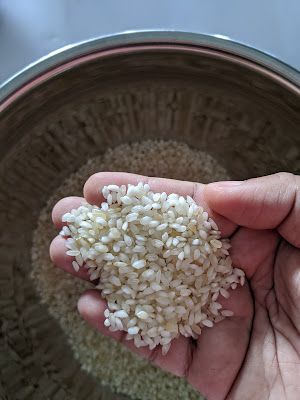
  • Idly rice (any brand) - 3 Cups
  • Boiled rice : 1 cup
  • Urad Dal : 1 cup
  • Poha/ Puffed rice or cooked rice : fistful
  • Methi or fenugreek seeds: 4-5 seeds
Utensils to be used :
  • Mixie or grinder
  • Big bowl for fermentation
Method: 
  1. Wash and rinse idly rice and boiled rice together. And then add water to keep it soaked.
  2. Similarly, in a separate vessel, wash and rinse the urad dal too. Fill it with water and keep for soaking
  3. Once this is done, add the methi seeds to the Urad dal vessel.
  4. These needs to be soaked at least for 5-6 hrs. I usually plan and keep it soaked a night before or at least for 6 hrs.
  5. After its soaked for at least 5 hrs, add the rice combo to mixie or grinder and grind it to a fine paste/batter. 
  6. Add puffed rice or poha** while grinding the rice. Transfer this to a big vessel/bowl and keep aside. 
  7. Next, grind the urad dal and fenugreek seeds while adding little water. Make sure its not very watery. Transfer this to the rice batter bowl and mix well
  8.  I prefer to use my hands to mix it well and close it with a lid. 
  9. Keep this for fermentation in a warm place. 
  10. Hours of fermentation depends upon the weather at each place. If its too cold outside, I prefer to keep the batter inside my oven so its warm. (see notes)
  11. After few hours you will see the batter has risen and fermented and its ready to be made into crispy dosas or fluffy Idli's.
  12. The batter is quite thick and hence for dosa's, take little amount of batter and add water to make it slightly thin. Add required salt to the batter and make crispy dosa. 
  13. For Idly, you can use the batter as it is and this will give me perfect fluffy and soft idly. Do not forget to add salt before using. 
Notes:
  • You can use any brand Idly rice, and boiled rice. 
  • If you don't have poha/ puffed rice you can also use cooked rice. Do not skip this as it makes the batter super soft. 
  • I usually soak poha or puffed rice for 10 mins before grinding the rice. 
  • Soaking it overnight makes it a little more easier to grind
  • You can use any size cup you have, but make sure the ratio should be same as mentioned in the recipe - 3-1-1 (3 cup idly rice- 1 cup boiled rice- 1 cup urad dal). 
  • With this ratio you can use any size cup depending on how much quantity you would want. Make sure you use the same cup for all the measurements. 
  • If its cold weather outside, I prefer keeping the batter inside my oven so that it stays warm and ferments faster/on time. 
Hope this will help someone like me who never used to make the batter at home just because the measurements were always wrong. But trust me with these measurements you will always get the perfect batter its very very easy to make. 

If this helps you, please do not forget to share with others. Do subscribe to get new recipes straight to your inbox. 
If you happen to make this do tag me on Instagram and pin it on Pinterest


Comments

Most Popular Ones

Super Moist Chocolate cake with Frosting

If you are looking for a super moist cake which is easy and can be made in one bowl, well look no further -this is the one. Its extremely moist, melts in your mouth chocolate cake. And to have these super moist cake with a drizzle of creamy chocolate frosting is just divine. Another great thing about this cake recipe is that it calls for simple ingredients that I always have on hand. Nothing beats being able to make one of your favorite cakes without having to run to the store for ingredients. In short this recipe is perfect for all the chocolate lovers out there. With the measurements given below you will yield a 1 cake made in 8 * 8 inch cake tin. You can double the amount and make it as 2 cakes for a layered 2 tier cake with frosting. Also these can be baked as a loaf cake. PS: For all those who want to have the measurements to be reduced into half the quantity or want to double the quantity (specially for baking) I recommend using a recipe calculator. I usually use this Recipe Cal

Easy Sambar (without tamarind)

Sambar is a must in most south Indian families and like others even I have grown up having dosa- sambhar and chutney's. A Sambar is a lentil based vegetable stew or curry cooked with dal/lentils along with some veggies and some tamarind pulp. There are coconut based sambar as well and each region has its own sambar variation. In my house, we all prefer quick meals, but yet tasty. My mother who was a working lady would make elaborate meals only during holidays or special occasions. Rest all the meals would be quick yet very very tasty. This is one such sambar which my mom has taught me and is super quick.  This doesn't use tamarind like in a traditional sambar and gets its tangy flavour from tomatoes. Its quick, one pot sambar recipe. Lets dive in and see how its done: Ingredients: Serves 3 1/2 to 1 cup Tur Dal/ Yellow Lentils 2-3 tomatoes chopped (depending on size) 1/2 cup Veggies each of your choice cubed Turmeric powder A pinch of Asafoetida/ Hing 1/2 tsp chilli powder Salt

Home-Made Nuts Powder

Home-Made Nuts powder is something which I have been making since Jeremy was a 9 month old. Initially to introduce nuts, I used to powder each nut separately (one day each) and mix with every food. As he grew older I realized he hates whole nuts especially Almonds and Pistachios. Cashews are still ok with him provided they are salted ones. But still he wasn't consuming much. Thats when I decided to continue making the essential and important nut powder. He hates the fact that nuts or chunky powder has been added and just rejects the whole meal even though its tasty and likes it. But this fine nut powder is a winner and I add it up in almost everything on a daily basis.  So this nut powder is perfect for fussy kid like mine or if you just wanna introduce nuts to your kids diet, this is a good solution. Its pretty simple and fuss free.   The powder is suitable for babies over 8 months, but before you feed this to your baby, make sure that baby has already tried the powdered version o