
Most stores now do have asian section with variety of asian things available throughout. But just in case you do not get sweet/sticky rice, you can make with any regular rice.
You could use regular white rice or brown rice to create a similar texture, but you won’t get the same level of stickiness as you would with the sweet rice. If you’re going with regular white rice, short-grain white rice is your best bet to achieve stickiness as it has higher levels of starch.
To make sticky rice using regular rice, let the rice soak in water for at least 1 hr before you cook it, which will help make it stickier in the end.
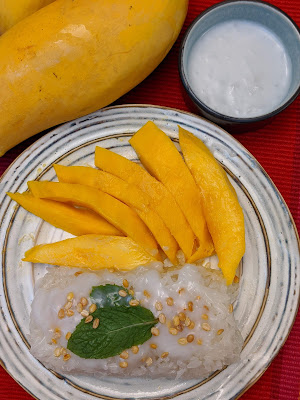
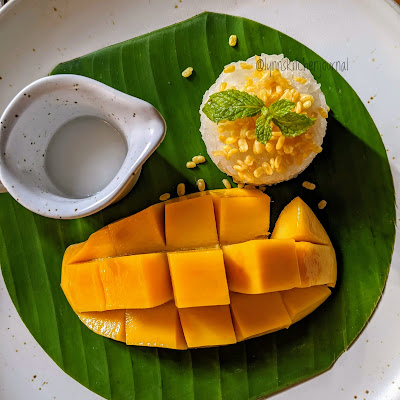
Thai sticky rice with mango hits all the sweet, silky, creamy spots you want in a satisfying dessert. It's a nice, simple way to get your sweet fix. Lets see how its done:
You could use regular white rice or brown rice to create a similar texture, but you won’t get the same level of stickiness as you would with the sweet rice. If you’re going with regular white rice, short-grain white rice is your best bet to achieve stickiness as it has higher levels of starch.
To make sticky rice using regular rice, let the rice soak in water for at least 1 hr before you cook it, which will help make it stickier in the end.
Thai sticky rice with mango hits all the sweet, silky, creamy spots you want in a satisfying dessert. It's a nice, simple way to get your sweet fix. Lets see how its done:
Ingredients:
- 2 cups of sweet or glutinous rice
- 1 1/6 cup of coconut milk
- 1/2 cup sugar (add more if you want it sweeter)
- 2 pinches of salt
- 1 tablespoon cornstarch
- 2 ripe mangoes, sliced on diagonal or chopped well
- Sesame seeds or roasted yellow mung beans for garnish (adds crunch)
- Rinse and drain rice, until the water clears. Soak rice for at least 1 hour. It is best to leave overnight if you want it to cook faster. I leave it overnight
- Boil water in a steamer, and pour rice inside of cheesecloth /tea towel and place in steamer covered. (see notes)
- Check after 10 to 15 minutes to see if the grains are tender. If not, cook longer and taste again. It should be chewy but not hard in the middle of the grain.
- Transfer to a bowl and let cool.
- Meanwhile, combine coconut milk, sugar, and salt in a pot and bring to a slight boil.
- Pour half of coconut creme sauce into rice, stir well, and let it cool and soak for about 10 minutes.
- In a small bowl, make a cornstarch slurry by combining the cornstarch and 1 tablespoon cold water.
- Stir into the rest of the sauce, and heat on low until thickened.
- Peel mango, and slice on a diagonal.
- Serve mango slices along rice, sprinkle sesame seeds, and ladle additional sauce on rice and mangoes.

Notes:


- Like mentioned before best is to use the sweet/Sticky rice for this and I recommend to soak it overnight for best results and for easy cooking
- If using regular rice, make sure to soak for 1 hr and ratio of water to be little more for cooking than usual. If its 1 cup rice, add 2 cups + 2 tbsp of water for it to cook through and become little mushy and sticky.
- Try and use small grain rice if using regular rice
- If using sticky rice, it needs to be steamed as mentioned in the method above. Only regular rice needs to be cooked in water
- You can also steam in normal steamer with a closed lid instead of using in a tea towel
- Always try and use sweet, ripe mangoes for this to get that awesome sweetness.

We also went ahead and made some popsicles from the little which was leftover😜. Just layered rice, mango slices and coconut sauce all over and popped them into the freezer. Mango sticky rice Popsicles ready to be relished. Images below


Looks yummylicious
ReplyDeleteThank you so much. Do try it out, its delicious.
Delete