
So if you are craving homemade fudgy brownies, and if you have 10 minutes, (well that’s how long it takes to make these moist and fudgy homemade brownies) go ahead and read, this recipe is for you.
If you are looking for some healthy bakes, do check out Sweet Potato Brownies on the blog.
Now what makes these Brownies Fudgy?
Several things make brownies fudgy instead of cakey. These brownies fall into the “fudgy” category, mainly because of :
- Fat to flour ratio: These brownies have a high fat to flour ratio.
- They have more fat (Butter, oil, chocolate chips) than flour. This creates a dense, fudgy texture.


Do we need fancy ingredients to make these homemade delicious treats?
Not at all is the answer. All we need are basic few ingredients which we usually would have at home.
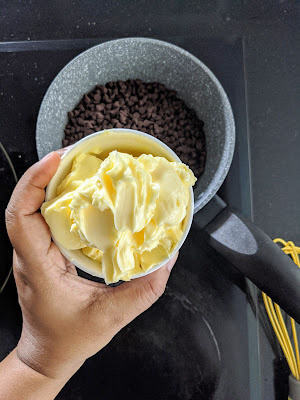
- Butter – Lots of butter keeps these brownies nice and fudgy and moist. I add little extra oil as well to make it more moist
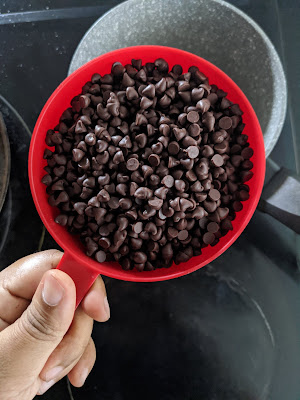
- Chocolate – I like the rich flavor of Dark chocolate in my brownies but you can use semi-sweet or milk chocolate.
- Sugar – Sugar adds moisture and sweetness to your brownies.You could also use little brown sugar which adds a nice flavor and a little bit of chew to the brownies.
- Eggs – Eggs add moisture and structure to your brownies.
- Cocoa Powder – I prefer to use this Natural unsweetened cocoa Powder.
- Flour – This recipe uses regular all-purpose flour

Process to Make these Brownies: (detailed recipe below)
1. Melt Chocolate: In a saucepan over low heat, melt together chocolate chips and butter. Set aside to cool for 15 minutes. Alternatively, I prefer to melt the butter & chocolates in a double boiler method to avoid any chocolate burns. (Have shown both ways in the video)
1. Melt Chocolate: In a saucepan over low heat, melt together chocolate chips and butter. Set aside to cool for 15 minutes. Alternatively, I prefer to melt the butter & chocolates in a double boiler method to avoid any chocolate burns. (Have shown both ways in the video)
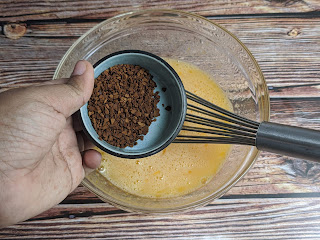
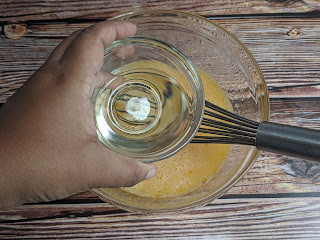
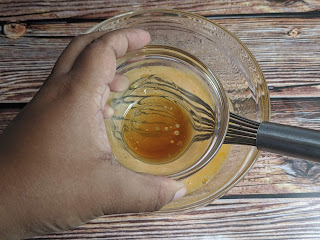
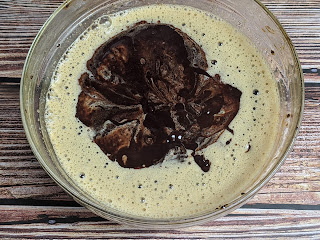
2. Wet Ingredients: Whisk together eggs, sugar, instant coffee granules, oil, and vanilla extract. Then whisk in the cooled chocolate mixture into the egg mixture.
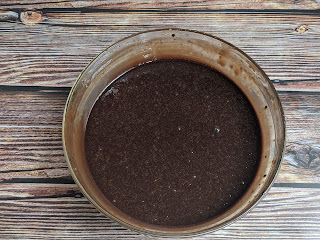
3. Dry Ingredients: Whisk and strain together flour, cocoa, baking powder, then fold these dry ingredients into the chocolate batter until no streaks remain.
3. Dry Ingredients: Whisk and strain together flour, cocoa, baking powder, then fold these dry ingredients into the chocolate batter until no streaks remain.
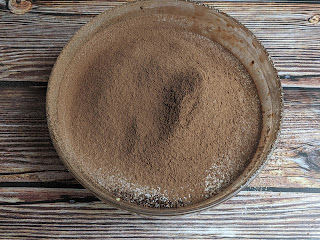
5. Pour and Bake: Sprinkle the top with 1/2 cup chocolate chips or chopped dark chocolate (optional). Spread brownie batter into prepared pan, and bake at 350˚F or 170℃ for 35-40 minutes. (see notes)
How Long to Bake Brownies?
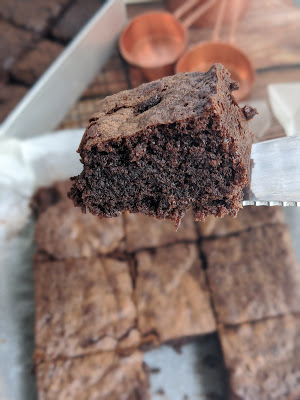
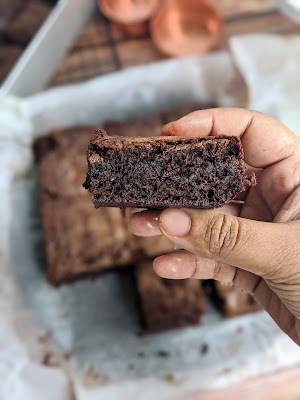
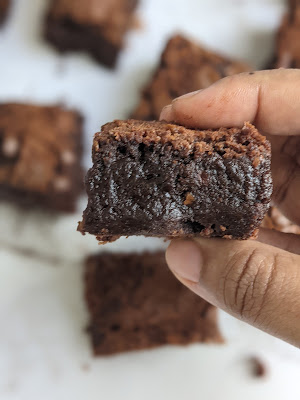
For Fudgy Brownies – Bake for 35-37 minutes max. A toothpick inserted into the center will come out fudgy and not clean.
For Soft and Moist Brownies – Bake for 40 minutes. A toothpick inserted in the center should come out with moist crumbs attached.
Remember to read the notes below before you start for tips.
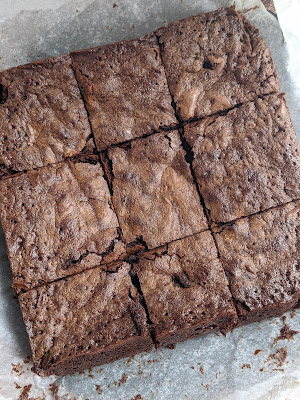
Lets see how its done. Reference Pics and video is uploaded below the recipe. With this measurement best is to use a 9*9 inch cake tin. But I have used 8*8 and had the batter divide to half and cooked for exact 35 mins.
Do not forget to take a look at other Bakes on the blog.
See Notes: **
Ingredients:
- 16 Tbsp salted or unsalted butter (softened or cut into pieces)
- 2 cups semisweet chocolate chips (1 cup = 240 ml)
- 4 large Eggs
- 1 1/4 cups granulated sugar
- 1 Tbsp instant coffee granules **
- 3 Tbsp vegetable oil
- 1 Tbsp vanilla extract
- 2/3 cup all-purpose flour
- 1/2 cup unsweetened cocoa powder
- 1 1/2 tsp baking powder (optional)**
- 1/2 cup dark chocolate (70% cocoa) - (Optional )
- 1/2 tsp salt (if not using salted butter)
Method:
- Preheat oven to 350˚F or 170 ℃
- Butter a 8x8 pan and line with parchment paper. **
- In a medium saucepan over low heat, melt together 2 cups chocolate chips and butter while whisking then set aside to cool 15 minutes.
- In a second large bowl, whisk together 4 eggs, 1 1/4 cups granulated sugar and coffee granules, 3 Tbsp oil and 1 Tbsp vanilla extract.
- Stir in the now warm chocolate mixture (which you had kept aside) into the egg mixture.
- Take a strainer and add in together 2/3 cup flour, 1/2 cup cocoa, 1 1/2 tsp baking powder** and 1/2 tsp salt**. Strain and add them to the liquid mix
- Then use a spatula to fold mixture into the batter and fold just until combined. Do not over mix.
- Add in the dark chocolate if using, mix. Alternatively you can use 1/2 cup of chocolate chips and sprinkle over the batter once its poured in pan.
- Transfer batter to prepared pan.
- Bake at 170℃ for 35-40 min depending on the desired doneness and cake tin size.*
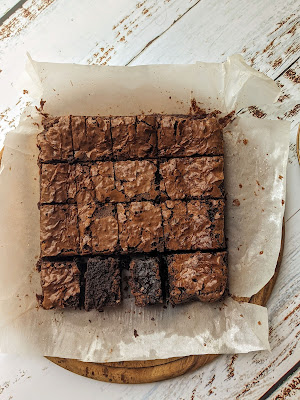
- Cool until nearly at room temperature then cut into bars before serving.
- Enjoy these as it is or have warm with some cold vanilla ice cream.
- I usually use baking powder. And still these come out fudgy. But if you want it more fudgy then avoid the baking powder.
- I use salted butter, hence I don't add salt with the dry ingredients. If you are using unsalted butter, do remember to add salt for sure.
- When you are mixing the dry ingredients to the wet ingredients, make sure NOT to over-mix. Always use the cut and fold or folding over method, and mix only till its all combined.
- For fudgy brownies, bake 35-37 minutes and a toothpick should come out fudgy. (see below for pan size and time for baking)
- Do NOT over bake: Brownies baked too long will end up dry and crumbly. Start checking the brownies 5-10 minutes before the recipe says that they should be done. They are done when the edges are set and a toothpick inserted into the center comes out with fudgy crumbs, but no raw batter. Remember, there are a lot of melty chocolate chips in these brownies, so don’t mistakenly think that melted chocolate means that they’re underdone.
- Adding Chocolate Chips or chopped dark chocolate at the end helps to ensure a fudgy brownie. You can use your favorite chocolate chips, semisweet for a classic flavor or bittersweet for a dark chocolate flavor.
- Line your baking pan with foil or parchment paper for easy removal and clean up. You can lift the whole batch of brownies right out of the pan by lifting the parchment paper.
- A little espresso/coffee powder really intensifies the chocolate flavor in these brownies. It does not impart a coffee flavor, but it simply deepens the chocolate and makes it more flavourful. But this is completely optional.
- Remember Chocolates are the key ingredient in here, and hence they need to be good quality to get the perfect brownies. I usually use Hershey's chocochips & extra Lindt dark chocolate (70%)
Pan size:
- 8×8 Pan – I usually use this size pan, but make the brownie in 2 batches, so I get perfect size 2 brownies. If you don't want to make 2 batches, either reduce the ingredients and make a smaller batch or you can use this smaller size pan which will result in taller brownies that require a longer baking time (40-48 minutes). Choice is yours.
- Perfect pan size for this amount of ingredients/batter will be a 9*9 inch cake tin.
How to Store Brownies:
- Brownies can be stored at room temperature in a low humidity environment. To keep them fresh and moist, cover with plastic wrap directly over the brownies and store in an airtight container for 4-5 days.
- Freezer – brownies can be frozen for up to 3 months. To keep brownies moister, do not cut brownies until you are ready to eat them.
If you have any doubts while baking these, please do drop in a comment below and I promise to answer as soon as possible.


Love the step by step pics Lynn!
ReplyDeleteThank you so much :)
Delete